Wednesday, June 29, 2011

Ukrainian Vareniki


I mentioned a few months ago that I lived in Ukraine until pretty recently.  I loved everything (well, almost everything) about it there.  One of the things I truly loved and enjoyed was the FOOD.  My husband is Ukrainian and I have studied Russian and Russian/Ukrainian history for years, so I was no stranger to Ukrainian cuisine, but I loved living there and getting to have it whenever I wanted and trying so many new and exciting things.  In addition, there are so many restaurants (on nearly every corner) for cuisine types that we just don't see here in America, at least not often.  Things like Georgian, Armenian, Turkish and Crimean.  Right now, I am practically salivating thinking of the foods I miss!

One of those foods is vareniki: little dumplings with different fillings like meat, cabbage, potatoes, sometimes berries or cherries.  One of the important things is that the fillings are pre-cooked in vareniki.  There are another kind of dumpling, called pelmeni, that are smaller and typically have only meat fillings, where the filling is NOT cooked ahead of time.  My favorite kind of vareniki is potato and sauteed onions, served with just a little bit of butter.  I've been wanting to try making these for some time now, and finally got a recipe from my cousin-in-law in Ukraine.

So here's my first attempt and my favorite of Ukrainian delicacies!

 Vareniki Dough

(I made half this recipe for dough and the recipe yielded 22 vareniki.  A serving is maybe 4-5 as a side dish and 8-9 as a meal)


3 cups flour
3/4 cups cool water
2 eggs
1/2 tsp salt

Mix all ingredients to form a dough ball.  Dough should be neither too dry or too sticky.  If it is either, add a little flour or water and work it is until you get a dough ball that is smooth.  Cover with a tea towel and let sit for an hour.  In the meantime, make the filling.


 Fillings
Potato-
1 large russet potato
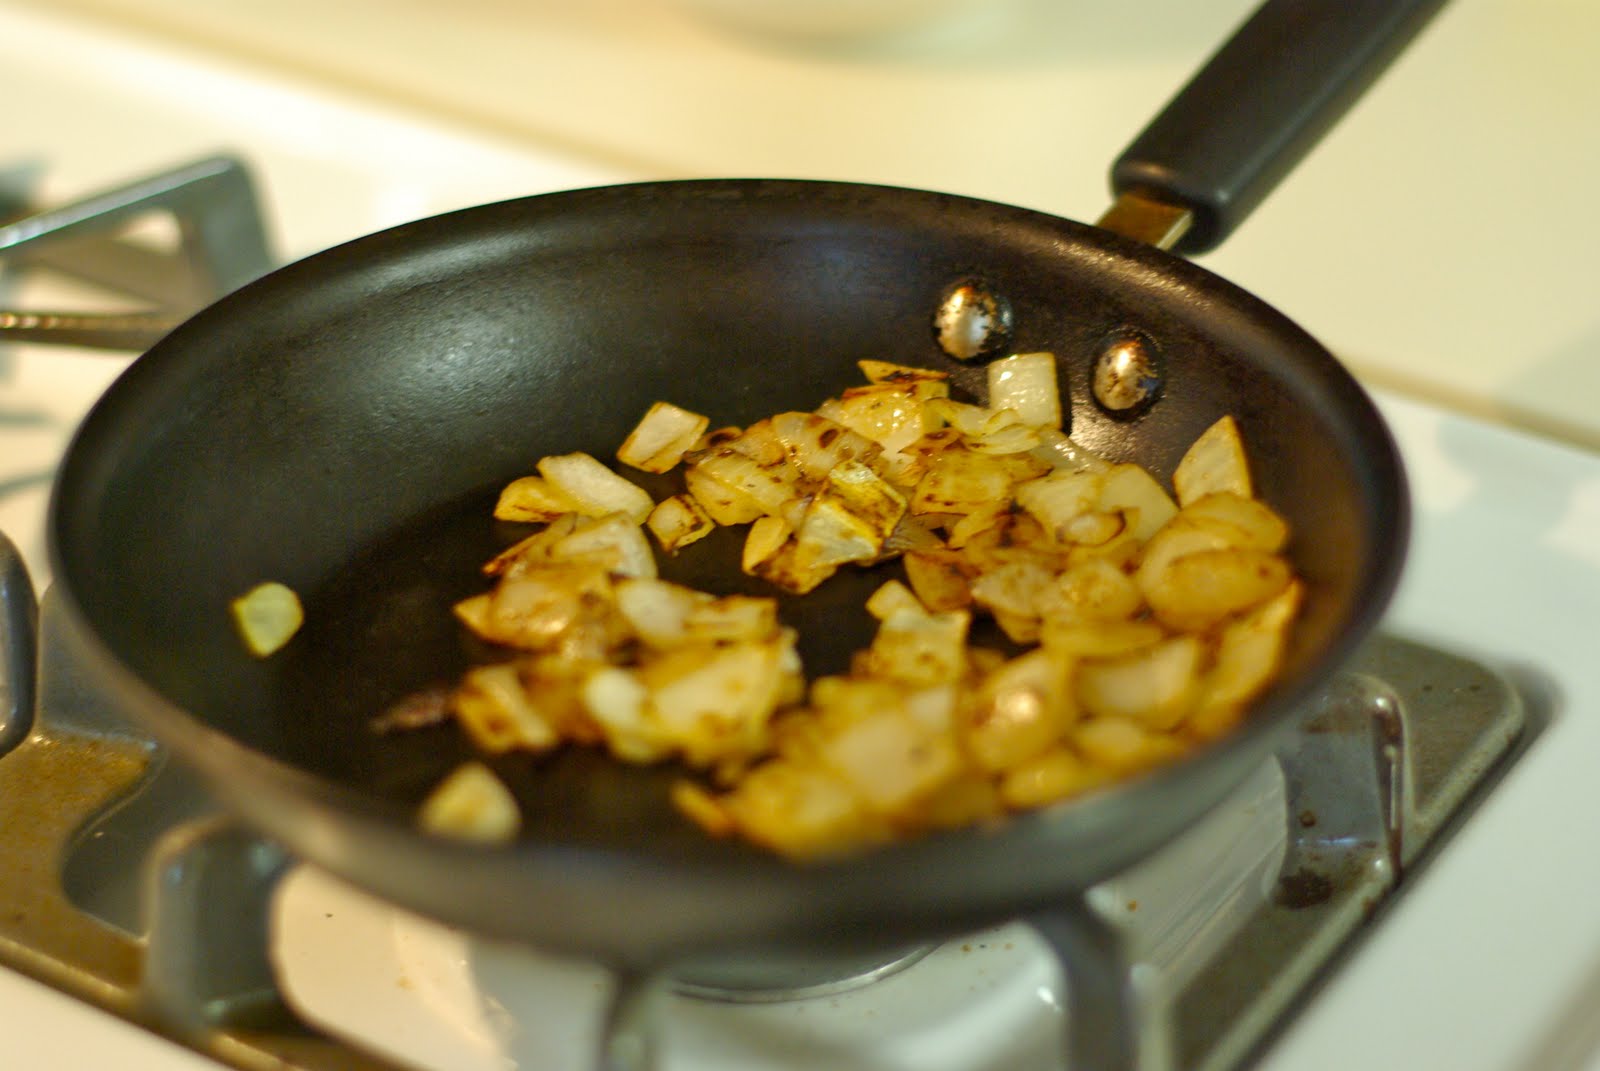
1 onion (a sweet Vidalia is great)
butter
milk

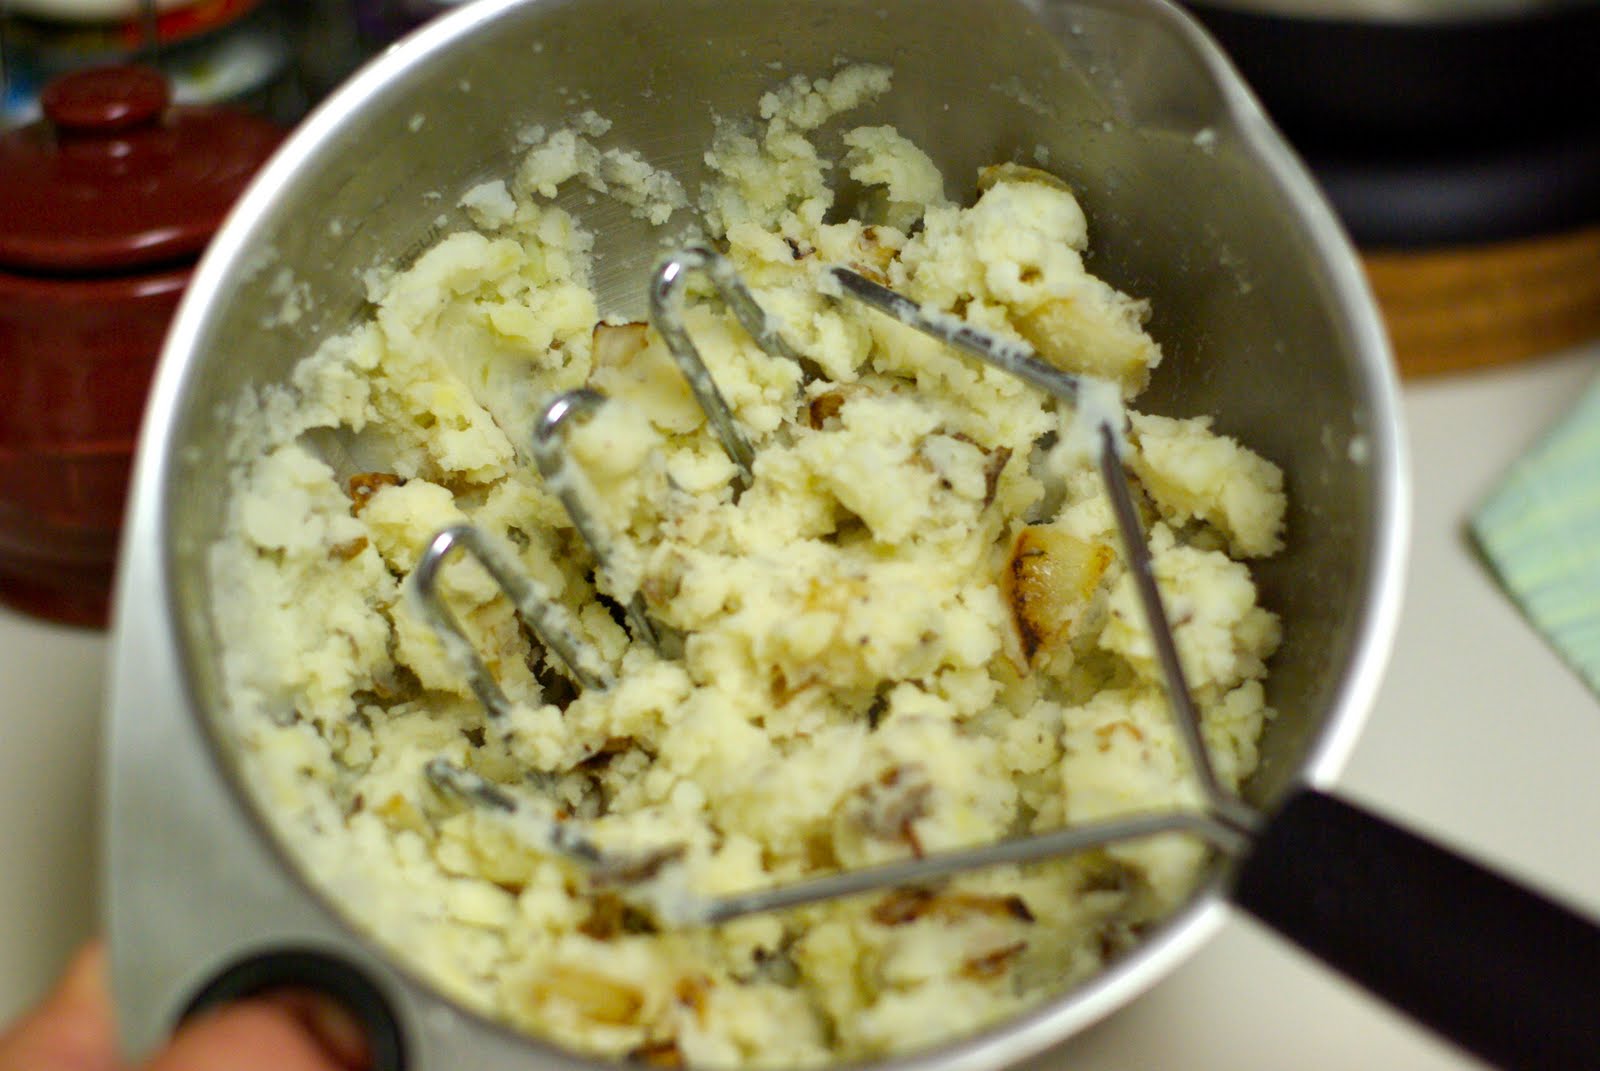
Cut potato into cubes and boil until soft.  Saute onion until tender and browned.  With a ricer or masher, mash potato and onion together, adding butter and milk as needed.  Potato mixture should not be too dry and should hold together well.  Add salt to taste.

Chicken-
3 medium boneless, skinless chicken breast
1-2 onions

Boil chicken in salted water.  Shred or dice the chicken.  Saute onions until tender and browned.  Combine chicken and onion, adding a little broth if it is too dry.  Add salt to taste.


Preparing the vareniki-

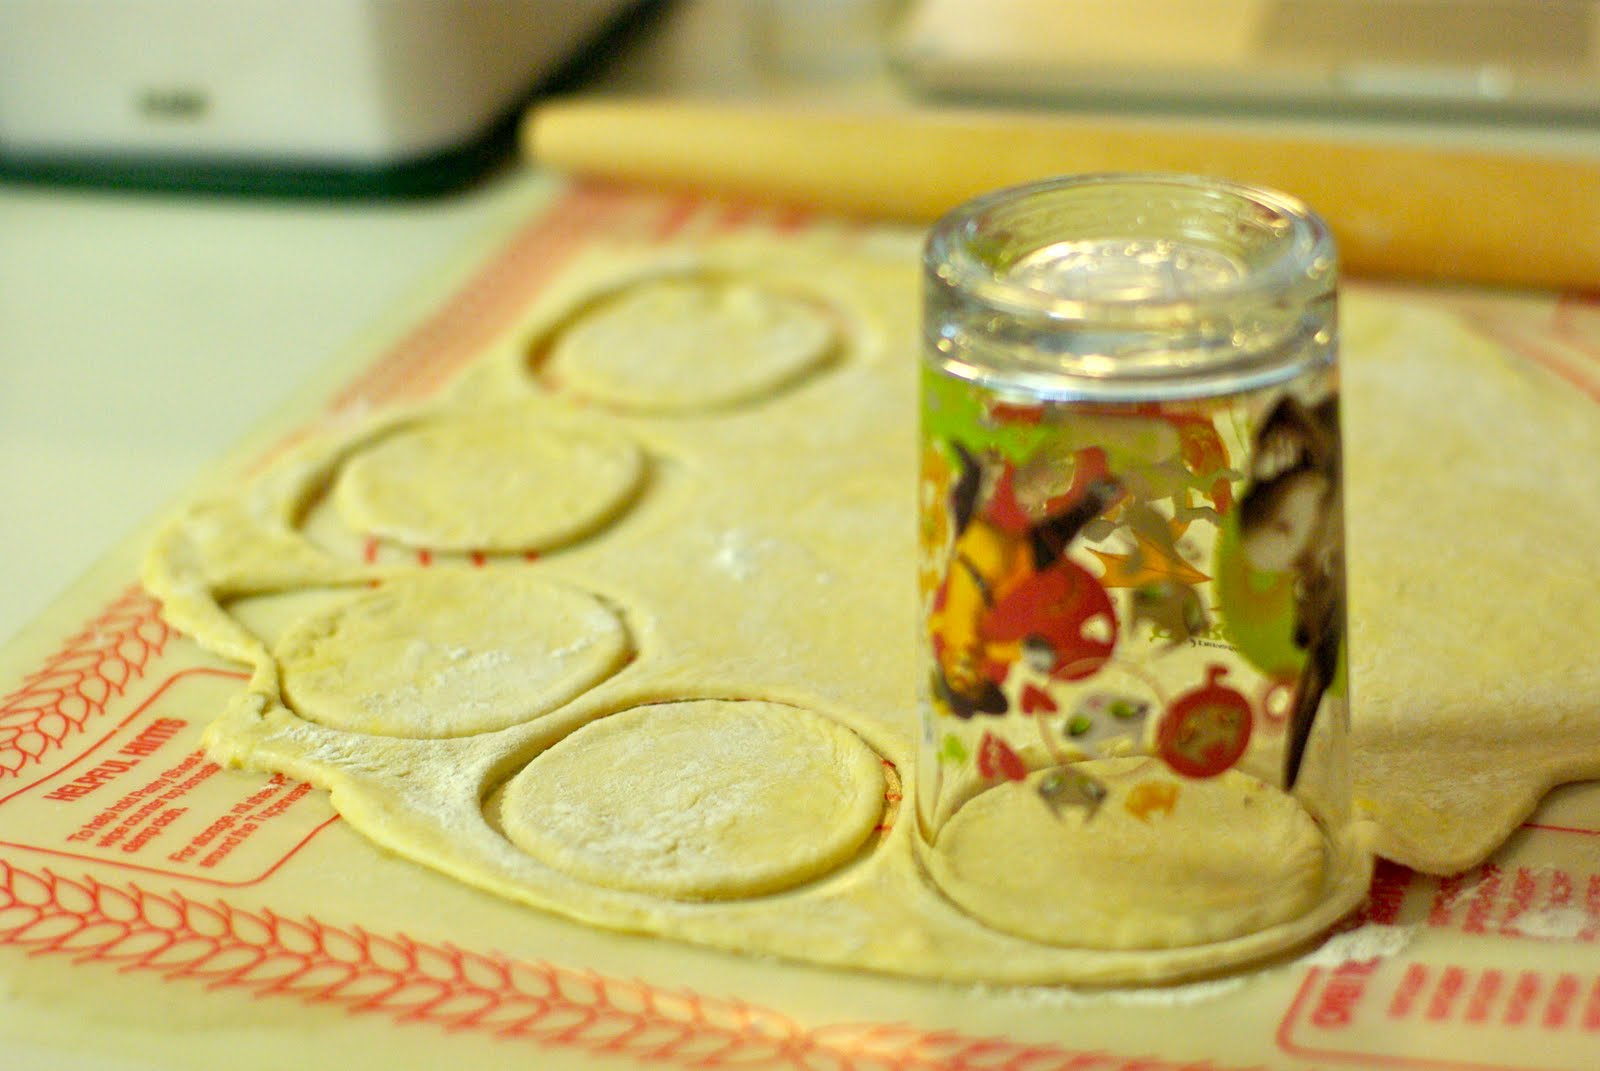
Dust the counter with flour and roll out a chunk of dough (about half or a third if you have done a full recipe.)  Dough should be about 3 millimeters thick. Using a glass or biscuit cutter, cut circles from the dough.  They should be around 3-4 inches across.  You'll want to squeeze as many as you can from the rolled dough.  I noticed that the dough became a little tougher the more I worked with it, so the less re-rolling you need to do, the better.

Take each circle and place a small amount of filling on one half.  You don't want too much or the dough will stretch and won't hold the filling.  Fold the dough circle over and pinch them shut.  If they won't seal, dab a little water on the dough and that should help make the seal.

At this point, the vareniki are ready to be either boiled or frozen.  If you plan to eat some or all of them right away, boil for 8-9 minutes.  If you plan to freeze them, freeze in a single layer and then transfer to a freezer bag.  Preparation from frozen is the same, boil 8-9 minutes.  They will float when they are done.

Serve with butter, fried onions and/or sour cream.  My favorite is with butter and onions, although I skipped the onions this time (I actually forgot to save some out from my onions I sauteed for the filling.)  And I like to eat them with a cup of fresh mint leaf tea with honey and lemon.  I close my eyes and imagine I am back in Ukraine.

I was pretty happy with my results.  I thought they were very authentic, and I've had vareniki as authentic as you can get, both in Ukrainian restaurants and prepared by my Ukrainian aunt-in-law.

As I prepared each one, I put them on a plate.  I ended up cooking basically the top layer for myself and put the rest in the freezer.  What I SHOULD have done was put down a layer of parchment or wax paper.  When I took them out of the freezer to transfer to a freezer bag, a couple were frozen to the plate and I broke them as I tried to pry them off.  Unfortunately, this ruined them because once they are open, the filling will fall straight out when in the boiling water.  So, lesson learned and noted for next time, use wax paper to avoid the vareniki sticking to the plate and getting ruined.


This is my favorite Ukrainian restaurant in Kyiv, Ukraine.  It's called Harbuz and Co.  Harbuz is the Ukrainian word for Pumpkin, so the name of the restaurant is essentially Pumpkin and Co.  I miss this place SO much.  I went there for lunch almost weekly when I lived there.  It's very cozy.

Monday, June 27, 2011

Blueberry Vanilla Bean Jam


More blueberries and more jam!  I decided to take some of the beautiful blueberries that I got at Costco and make blueberry jam.  I really wanted to add something to jazz up the flavor a little, though.  I ended up scraping out an entire vanilla bean pod into the jam and it was just the flavor I was looking for.  This is another recipe that I got from my "In a Pickle or a Jam" cookbook, circa 1971.  Luckily, things like this are pretty timeless, with the exception of how the final product is sealed (like I mentioned in a previous post, most of the recipes call for sealing with paraffin wax.)

This was a small batch, since I am still learning about canning, I didn't want to use up all my blueberries, plus we still wanted some for things like snacks and blueberry pancakes.

Blueberry Vanilla Bean Jam
(yields 1 1/2 pints)


3 cups blueberries
1/2 lemon, juiced and zested
3 1/2 cups sugar
1 vanilla bean

Prepare your jars.  I used 1 pint jar and 1 half pint jar.  I would have used all half pint jars, but I only had two lids left.

Combine blueberries, lemon zest and juice, and sugar in a stockpot. Heat very slowly over low heat, mashing blueberries with a potato masher or ricer.  Once mixture comes to a boil, add seeds from vanilla bean and mix in thoroughly.

Boil mixture rapidly until jam is set, mixing often.  I used my candy thermometer to keep track of the temperature and once it reached 220F, I started testing it using the cold plate method.  I had a plate in the freezer and put a little of the jam on it.  When the jam jelled up after being put on the plate, it was ready.  This took about 10 minutes for me.

Once it is ready, fill the prepared jars, wipe the rims, seal and process.

The vanilla added just the right flavor.  I plan to buy some more blueberries and double the recipe sometime soon.  I want to make sure I have enough of this one to last all winter!

And somehow, I must have been really involved because I neglected to take a single picture of the process on this one, until the jars were sealed and processed.

Saturday, June 25, 2011

Fresh Blueberry Bundt Cake


One of the reasons I love summer is the fresh fruit that is so readily available, especially the berries.  My family LOVES berries, all kinds.  Blueberries bring back memories of childhood.  I grew up in Maine and I think everyone has heard of wild Maine blueberries.  If you live out in the country, you likely have some wild blueberry bushes growing somewhere on your land (or some other berry-my mom has black raspberries growing all along her yard.)  

So the other day I made my inaugural trip to Costco (you're thinking, "What?!"- give me a break, I used to live overseas, no Costco there.)  Anyhow, they had these huge containers of beautiful blueberries, so I had to get some.  We've been snacking on them, putting them in our cereal, having blueberry pancakes, all the usual things.  But, we had a playdate to go to and I wanted to bring something yummy.  I had some buttermilk left over from the whoopie pies, and I wanted to use that if possible, too.  I didn't find what I was looking for in my cookbooks, but a quick search online gave me a recipe at Epicurious to work with.  The end result was a really moist, flavorful blueberry cake.

Aren't they beautiful?

Blueberry Buttermilk Cake
3 cups flour
1 Tbsp baking powder
3/4 Splenda for baking
3/4 cup butter or margarine (I used a 50/50 blend)
3 eggs
Zest of 1 large lemon
1 cup buttermilk
2 tsp vanilla extract
2 cups fresh blueberries


Preheat oven to 350F and prepare a large bundt pan.  I usually use Baker's Joy, although my stoneware bundt pan is pretty well seasoned, but I gave it a light spraying anyway. 
Combine the flour and baking soda in a medium bowl and set aside.  In another bowl, use a hand mixer or stand mixer to cream together the butter and sugar until nice and fluffy.  Add eggs, one at a time, combining well after each egg.
  
Combine the buttermilk and the vanilla.  Alternately add the dry and liquid ingredients to the butter/sugar combo, mixing well after each addition.  The batter should be thick and and airy. 

The next step is to lightly fold the blueberries in to the batter, trying to avoid breaking as few of the berries as possible, while distributing them evenly in the batter.  Transfer the batter to your prepared bundt pan, smoothing the batter in the pan.

Bake at 350F for one hour, or until a cake tester comes out cleanly.  We had to leave for swimming lessons and I was a little late getting this in the oven, so at 55 minutes, I turned off the oven and opened the door a crack, hoping for the best when we got back.  An hour later, we returned, I took the cake out of the oven, crossed my fingers and turned it out onto the cooling rack.  I needn't have worried.  The cake came right out of the pan and was fully baked.  I wrapped it up (still warm!) and rushed off to our playdate.  The cake got rave reviews from the moms and the kids in attendance.  

I'd make this again for a brunch, easily.  Or just to have on hand for a snack cake.  It's also a great cake to bring somewhere, as it traveled very well. It was easy to make and came out very moist and delicious.  


Wednesday, June 22, 2011

Watermelon Rind Pickles


I love the coloring here!


It may by now be evident that I don't just enjoy baking.  After waiting FOREVER to get canning supplies, I have been bitten by the canning bug.  It's a little time consuming, but kind of fun and very satisfying.  Taking all these things and making them into something that will last and that my family, friends and I can enjoy much later feels good!  Plus, when I make jam or whatever else, I know EXACTLY what goes into it and none of the ingredients start with high fructose, partially hydrogenated, or contain a dye number.
One thing I have always wanted to try is watermelon rind pickles.  My mom used to make them and I'm pretty sure my grandmother did, too.  I always liked the idea and so when I picked up a watermelon the other day, I decided to give it a try!


 To start with,  I had to take the watermelon and cut out the pink flesh.  It was a smallish round watermelon and it had a lot of flesh!  Once I did that, I used a vegetable peeler to peel the green off of the rind.  I just wanted the white part.  Do not be scared, but the act of peeling the rind with the vegetable peeler was no fun at all.  Just make sure to aim the peeler AWAY from you.  I have a nasty scar on my thumb from many years ago, when I first learned that valuable piece of advice.


When you're done, you should have a few bowls of beautiful, pink watermelon.  Mine is destined for snacks, popsicles and possibly watermelon jelly.  And you should have a bowl of the peeled rind, cut into small pieces.  Now you're ready to start.


Watermelon Rind Pickles
(adapted from "In a Pickle or a Jam")
Yield: 5 8-ounce jars

cut up rind of one round watermelon
1/4 cup salt
cold water
3 cups sugar
2 cups vinegar
2 lemon slices
2 lime slices
3 cinnamon sticks
1 TBSP whole cloves
1 TBSP whole allspice (I'll admit here that I did not have whole allspice on hand, so I just added ground allspice)


Combine the rind with the salt and cover in cold water.  Cover with a towel and let soak overnight.

The next day, drain the rind and cover with fresh cold water in a heavy stockpot.  Heat water to boiling and simmer until rind is tender, about 15 minutes.  Drain and set aside.

Combine sugar, vinegar, lemon and lime slices in stockpot.  Wrap spices in a piece of cheesecloth and add that in as well.  Heat minutes to boiling and cook over medium heat for about 20 minutes.  It should thicken a little.


 Add the cooked rind back into the pot, one spoonful at a time.  Simmer at medium low heat, until rind is translucent and glossy looking.

The whole thing should be sweet smelling and aromatic and the rind should be very tender.  Remove the spice bag and spoon the rind into hot, sterilized jars.  Top off the jars with the remaining syrup.  Cover the jars and place in a hot water bath to seal.

I sampled these and they are very flavorful!  The cinnamon/cloves combo with the vinegar works great, I think.  This recipe gave me five 8-oz jars and I'm thinking they might go fast.  It's a good thing that it's watermelon season!

Sunday, June 19, 2011

Whoopie Pies!


Did you know that whoopie pies originated in Maine?  Pennsylvanians will try to tell you that they invented them, but don't believe them.  They are definitely from Maine.  I LOVE whoopie pies.  Two cakey cookies, with frosting in the middle?  What could be better?  And they are so adaptable. You can make different sizes, different flavors for the filling and the cake, there are tons of possibilities.  I've made traditional ones (dark chocolate cake, vanilla filling) and pumpkin cakes with cream cheese filling.  And I've had apple ones and I got a HUGE maple one at the Fryeburg Fair in Maine last year (THAT one was amazing.)  I want to make red velvet ones.  I love red velvet.  And I think banana would be yummy, too.  With cream cheese filling.

My munchkin had his last day of preschool and to celebrate, they had a party for the kids.  So of course, I brought dessert.  I had in my mind an idea of a cake that I wanted to make, but it didn't work out because I didn't have time the night before.  I had finals for grad school that I really had to work on and so I couldn't devote HOURS to baking.  I wanted to make whoopie pies for the kids, because it needed to be something kid friendly and little sandwiches are easy for little hands.  So, I decided on mini whoopie pies for the kiddos and one large cake size whoopie pie for the adults.

Little people like simple, so I went with classic chocolate cakes and vanilla filling.  This recipe is  from one in a magazine called Fresh that is published by the grocery store Hannaford.  Here's a link to the original, but I left out the instant coffee.  Preschoolers don't need coffee, even in minuscule amounts.


Whoopie Pies
3/4 cups unsalted butter, softened
3/4 cups packed brown sugar
2 eggs
3 cups flour
3/4 cup cocoa powder
2 tsp baking soda
1 tsp salt
1 1/2 cups buttermilk
1 1/2 tsp vanilla extract

Preheat oven to 350F.  As always, I use my baking stones which are well seasoned and do not need to be sprayed or lined.  Regular baking sheets should be lined with parchment or sprayed with cooking spray.
In a medium mixing bowl, stir together flour, cocoa powder, baking soda, and salt.  Set aside.  Measure out buttermilk and add vanilla and set aside.
With an electric mixer on medium speed, mix butter and brown sugar until well blended.  Add eggs one at a time and continue mixing until smooth.
Add half of the flour mixture to the butter and sugar mixture and mix on medium until smooth.  Add half the buttermilk mixture and continue to mix on medium speed, scraping the sides when necessary.  Add the remaining flour and then the remaining buttermilk, mixing until smooth after each addition and continuing to scrape the sides of the bowl.


For my large, cake size whoopie pie, I scooped several spoonfuls of batter on to the baking stone and smoothed it out into a large circle, about 8-9 inches across and baked them for 14 minutes.  For my mini whoopie pies, I used small spoonfuls (about a tablespoon) and baked them for about 10 minutes.  But for normal sized pies, about 2-3 tablespoons should be sufficient.  Cakes should be puffy, but still soft to the touch.  Let cool for about 3 minutes and then transfer to a cooling rack to cool completely.

Vanilla Filling
3/4 cups unsalted butter
1 tsp vanilla extract
2 3/4 cups sifted confectionary sugar
3 cups marshmallow creme  (Fluff is best, but not available everywhere)


With an electric mixer on medium speed, mix butter and vanilla until well mixed and creamy.  Add half of the confectionary sugar and mix on low to combine then on high.  Add the rest and mix again, scraping sides as necessary.
Add marshmallow creme and mix until filling is fluffy and smooth.

For the big whoopie pie, I slathered on several large dollops of filling, smoothed it out and added the top.

The little ones took about a teaspoon of filling.


The fickle preschoolers seemed to like them, although, some licked out the filling and others just ate the cakes.  And the big one came out great, too.


 I think next time, red velvet.  Or maybe gingerbread ones around Christmastime...

Thursday, June 16, 2011

Homemade Strawberry Jam


So, I got all my canning supplies, finally found the time and bought myself a big load of strawberries.  Bright red, juicy ones, too.  And very sweet!

I have a great canning book that my mom gave to me at some point and she had it for as long as I can remember.  It's called "In a Pickle or a Jam" and it has 157 pages of recipes for making jams, pickles, dressings, chutneys and anything else you can think of to can.  So I looked there for my first strawberry jam recipe.

But first, I had to get my supplies ready.  I bought half pint jars for making jam.  So I needed to sterilize the jars and the lids.  I also bought some quart size jars because I want to make some pickles.  My husband LOVES pickles, especially the homemade variety, so I think he'll appreciate it.  He is out of town at the moment, so I'd like to get some started so they are ready by the time he gets home, or at least shortly thereafter.

I boiled the jars in my hot water bath pan that I bought and boiled the lids separately, and then got the jam started.

Simple Strawberry Jam
(From "In a Pickle or a Jam," without added pectin)

8 cups (2 quarts) firm and ripe strawberries (the sweeter, the better!)
3 1/2 cups sugar
juice of 2 lemons

Wash, hull and pat dry strawberries.  Combine strawberries and sugar and heat very slowly until sugar dissolves (this could take a while, for this batch it took about 10 minutes.) Once the sugar has all dissolved, add lemon juice.  Since strawberries are low in pectin, the lemon juice in this recipe adds the pectin that is needed in order for the jam to thicken and set.

After adding the lemon juice, increase the heat to bring the mixture to a boil.  Then, use a masher to, well, mash the strawberries.  The more you mash, the less chunky the jam will be.  So, if you like chunky strawberry jam, mash a little.  If you like it more even and spreadable, mash a lot.

Now, the recipe I have said it would take about 12 minutes to boil the strawberries until the jam was set.  In actuality, it took more like 30 minutes.  This book is from 1971.  Maybe 1970's strawberries had more natural pectin?  I guess we'll never know.  So, continue boiling until the jam is set. How do you test?  Like this:


To start with, use a candy thermometer.  The jam should be about 220F degrees when it is ready.  Once it reaches that point, you can take a small amount and put it on a small plate or in a small bowl and put it in the fridge for a minute. It should get right up when it's ready.

One thing to watch for during the boiling process: the foam that forms on the top.  Just skim it off and toss it out.  It's got so much air in it that if it goes in the jar, when it deflates, it will affect the headroom that is left.

Once your jam has been boiling for a while and has reached the right temperature and is ready to set, it's time to put it in the jars that are prepared and waiting.

I got a great, inexpensive set of beginner canning supplies on Amazon and it included the wide mouth funnel, a jar lifter, a lid lifter and a few other essential tools.  

You'll want to get your jars out of the hot water, where they have been sitting and keeping warm and lay them out to fill.  using the wide mouth funnel and a ladle (best if that is sterilized as well,) fill the jars one by one.  Leave about 1/4 inch of head space on each jar.  That is 1/4 inch measured from the very top of the jar.  This recipe said that it would make 6 8-ounce jars.  In actuality, it made 5 full half pint (8 oz) jars.  So maybe my 8 cups weren't packed full enough.  Who knows?

Then, wipe down the outside of the jars, add the lids and then the rims.  Then in they go to the hot water bath.  The water should cover the jars by about an inch and should be boiling.  The jars should boil for about 15 minutes to seal them.  Once you remove them from the water, as they start to cool, the lids will start to "pop" down.  You should hear a fairly audible pop.  If it's been a while and the lids don't pop, it's a good idea to place your jam in the refrigerator.

A little bit of canning trivia that I did not know.  The flat lids on the top that seal the jars?  Those are NOT reusable.  Once they have sealed once, they will not seal again.  So, reuse the jars and the rims, but make sure to buy new lids!

Another funny little thing.  My canning book is so old, apparently, that there are no directions for canning with a water bath or a pressure cooker.  The only method discussed is using paraffin wax to seal the jars.  I distinctly remember my grandmother making jams and sealing them with paraffin. I'm not sure anyone still does that?

So that's it.  A simple strawberry jam.  So easy, someone who has never canned (um, me) was able to do it and get great results.  It came out great, thickened up well and tastes WONDERFUL!  My 4 year old helper agreed.  And we decided to give a jar to his preschool teacher as an end of the year thank you gift.  We hope she will enjoy it, too!

Monday, June 6, 2011

Summertime Butterfly Cookies with Royal Icing

It's been a rainy, nasty spring here in Northern California.  Last weekend was no exception, so my munchkin and I decided to make some cutout cookies.


I've recently read a bit about decorating cookies with royal icing for that super smooth finish.  I am a buttercream girl and I've never tried the royal route.  But part of the reason for this blog is to encourage myself to try new things.  So I came upon this blog where the blogger does all kinds of great, beautiful cutout cookies with royal icing.  I mean, they are gorgeous! Here is the link.

So we went out and picked up the few supplies we needed (namely, meringue powder and squeeze bottles.)

I ended up making an orange flavored sugar cookie dough and an orange flavored royal icing.  The orange sugar cookies I adapted a little bit from this recipe for lemon cut out cookies.  I changed the lemon zest and juice to orange, and increased the amount slightly.  I also used Splenda for baking, as I do for most recipes.  And we decided to make butterflies, since we needed a boost of summery-ness.

Orange Cut-Out Sugar Cookies
3 cups unbleached flour
2 tsp baking powder
1/2 cup Splenda blend for baking
2 sticks unsalted butter
1 egg
1/2 tsp pure vanilla extract
1 Tbsp orange zest
1 tsp orange juice

Preheat oven to 350.   In one bowl, mix together flour and baking powder and set aside.  In another bowl, beat together butter and sugar until fluffy.  With a stand mixer, use the paddle attachment.  Add is eggs, vanilla, orange zest and juice.  Beat until well combined.

On low speed, add the flour a little at a time and beat until well blended.  Turn the dough out onto a flat surface to knead by hand.

(At this point, I wrapped up the dough in plastic wrap and put in the fridge for 2 days-I took it out for a half hour to warm up a little and it was perfect)

I use this large Tupperware mat for rolling out dough.  It was my mom's and she gave it to me at some point.  It make clean up a snap.  And I love my French rolling pin.

Roll out on a flat surface to about a 1/4" thickness and cut shapes.  Place on baking sheets lined with parchment or silicon sheets.  I personally use Pampered Chef baking stone that I have had for years.  They are very well seasoned and I don't need to use anything on them.  Food slides right off.


Bake cookies for 9-12 minutes.  Remove to cooling racks and let them cool completely.


Now for the icing:
Orange Royal Icing
4 Tbsp meringue powder
scant 1/2 cup water
4 cups sifted powdered sugar
1/2 tsp light corn syrup
1/2 tsp orange extract

Combine meringue powder and water and beat until foamy (I used my Kitchenaid stand mixer, as I always do for icing.  SO much easier.)

Add the sifted powdered sugar and beat on low until combined.  Add in corn syrup and orange extract.


At med-high speed, beat for 5-10 minutes, until glossy and stiff.  It will be very stiff, but be careful not to overbeat.

Now comes the decorating!  This part was much more time consuming than I had really thought it would be.  I've done lots of decorating with buttercream before, but this was a lot different.

First, I separated the icing into the different colors I wanted.  We decided to make our butterflies yellow and pink, with green bodies and outlines.  So, since I would be doing outlining with the green, I left that nice and thick.  For the pink and the yellow, since I would be using them to "flood" the cookies, I thinned out using a little water at a time, until it was about the consistency of maple syrup (the real stuff!)


I was surprised at how light royal icing is.  Buttercream is very thick from the butter, but the royal icing is thick, but very light.

Once I had the icings separated and colored, I put them into a piping bag and squeeze bottles and set to work.  First, I did the outlining on the butterflies.


I let that dry for a little while (about 20 minutes) and then added the flood icing.  I neglected to take pictures of that part, but here is a good youtube video tutorial.  I added some dots and did some swirls and the munchkin helped a bit with it all.


They aren't perfect, but for my first time trying royal icing, I was pretty happy with how they turned out.  They took a long time, but on a rainy weekend, we had plenty of that.  I still like the taste of buttercream better, but these were interesting and the icing was neat to work with.  The flavor of the icing is pretty bland, but that let the orange flavor in the cookies really shine through.

Friday, June 3, 2011

Operation: Vanilla Extract

So, I've been seeing all over the internet about people making homemade vanilla extract.  And I thought, "Hey, I can do that!"

So I tracked down some vanilla beans on Amazon (they weren't expensive and had great reviews-I got them and when I opened them, I was not disappointed) and found a small bottle of vodka in my liquor stash.  It's Ukrainian vodka, which is actually called gorilka (горілка).  I don't know if it's left over from our time in Ukraine, or if it's a gift from a Ukrainian.  Either way, it wasn't going to get drunk, so this seemed as good a use as any.

Every mention I found on making homemade vanilla extract was pretty straight forward.  So here's what I did.  It's a small bottle of vodka, probably less than a fifth.  I took three vanilla beans and cut them down the middle and spread them open, then cut them into thirds.  And into the vodka they went.

That's it.  It should take a couple months to reach the point where it is usable, and today is only day 3.  So it will be a while.
Vanilla Beans from Olive Nation-ordered from Amazon


Right after I added the beans


And after 1 day-you can see it is already starting to darken at the bottom

I'll give it a chance to "brew" and update in a month!