Showing posts with label cake. Show all posts

Friday, July 13, 2012

Best Ever Carrot Cake with Cream Cheese Frosting

I love carrot cake.

It is so flipping good. And healthy. I mean, there's all those carrots in it, right?

I made my own birthday cake again this year. Not because I had to, but because I wanted carrot cake and I wanted to make it. I found my inspiration here.

This cake has an obscene amount of carrots in it. It came out great and didn't last long. Here you go:

Cake:
2 1/4 cups flour
1 1/2 tsp baking powder
1 tsp baking soda
1 tsp cinnamon
1/4 tsp ginger
1/2 tsp salt
1/4 tsp nutmeg
4 eggs, room temperature
1 1/2 cups sugar
1 cup safflower oil
1/2 cup buttermilk
2/3 cup packed brown sugar
2 tsp vanilla
1/2 cups drained crushed pineapple
1 pound grated carrots
1 cup chopped pecans

Preheat oven to 350 and prepare three 8" or 9" cake pans with crisco and line with parchment paper.

Grate the carrots. Use your food processor, if you have one. Otherwise, you'll be grating carrots for a very long time. I used my food processor. It took about 5 minutes.

Combine all of the dry ingredients in a medium bowl and set aside. In a large bowl (I prefer my Kitchenaid stand mixer), combine the eggs, oil, both sugars, vanilla, buttermilk and pineapple. Mix in the dry ingredients. I usually mix in about 1/4-1/3 of dry ingredients at a time, so as not to have a cloud of flour erupt in my face from the mixer.

Once ingredients are well mixed, stir in the carrots. Pour the batter into the pans and bake for 35-40 minutes. Cool in pans for 30 minutes, then remove and continue cooling on racks.

Cream Cheese Frosting:
16 oz softened cream cheese (I use Neufchatel cheese)
1/2 cups softened unsalted butter
2 tsp vanilla extract
3 cups powdered sugar (you can add more if you need/want it)

Combine cream cheese and butter and beat until creamy. Beat in vanilla. Add in powdered sugar, 1 cup at a time. If the frosting is not thick enough for you, add more sugar until it is.

Assemble the cake by spreading about 1 cup of frosting between the layers and the remaining frosting on the top and sides. Sprinkle the pecans on top of the cake.


All that was left by the end of the day

This cake was moist and flavorful. I really enjoyed the addition of the pineapple. It added a bit of sweetness to the cake. I don't make carrot cake often (as much as I love it, I love so many other cakes that I am always trying new things) but next time I get a craving for carrot cake, I think this is the one I will make.

Enjoy!


Wednesday, July 6, 2011

Summertime Dessert Series: Lemon-Lime Sponge Cake with Lime Seven Minute Frosting

Ah, summer.  I just love summertime desserts.  They are cool and refreshing and a great way to forget about the heat.  At least for a little while.  And here in the California Bay Area, have we ever got some summer heat!  After a cold and rainy Spring, Summer has come on and brought us temperatures in the 90s and 100s. Perfect weather for a nice, cool dessert.  I'm going to try to post a cool summertime dessert every week and this week I'm starting with this Lemon-Lime Sponge cake with cool lime Seven Minute Frosting.


I started with a recipe for a daffodil cake from the now out of print Good Housekeeping Illustrated Cookbook. It's a hand me down from my mom, and one of my favorites.  There is a color picture index with a picture for EVERY recipe.  Some of the recipes are a little outdated (Eggs En Gelee or Fish Mousse, anyone?)  But there are some great classic recipes and it's one of the first places I usually look.

So, the Daffodil cake recipe is an orange lemon flavored cake, topped with an orange lemon icing.  I decided to go a different way with the cake and made a lemon lime sponge cake and topped it with seven minute frosting, one of my favorites, a fluffy cooked frosting.

Lemon-Lime Sponge Cake
1 1/4 cup egg whites
1 1/2 tsp cream of tartar
1 tsp vanilla extract (instead of extract here, I scraped one vanilla bean)
1/4 tsp salt
1 1/2 cups sugar
1 cup cake flour
4 egg yolks
2 tsp lemon zest
2 tsp lime zest

If you look REALLY closely here, you can see the vanilla bean flecks

Preheat oven to 375F.  In a large bowl with an electric mixer, beat egg whites, cream of tartar, vanilla and salt on high speed until soft peaks form.   Sprinkle in sugar, two tablespoons at a time, while continuing to beat at high speed, until sugar dissolves and stiff glossy peaks form.  Reduce the mixer speed to low and add flour gradually, beating until just blended.  


In a separate bowl, beat yolks at high speed until thick and lemon colored.  Fold in half of the egg white mixture, along with the lemon and lime zest.  Drop alternating spoonfuls into a 10 inch tube pan.  Bake 35-40 minutes.


After removing fro the oven, invert cake and cool in pan for 1 hour. Placing it upside down on a wine or beer bottle works well for this.  While the cake cools, it's time to move on to the frosting.


I've seen several recipes for seven minute frosting, but this is the one that I used for this cake.  It is from The Fannie Farmer Baking Book, another of my favorite cookbooks.  "Seven Minute" is a misnomer, though, as it takes a bit longer to make.

Lime Seven Minute Frosting
3/4 cup sugar
1/2 tsp cream of tartar
pinch of salt
2 egg whites
1/4 cup cold water
2 tsp vanilla extract
zest and juice of 1 small lime

Combine all ingredients except vanilla in either a large, heat resistant mixing bowl, or the top of a large double boiler.  Set over simmering, but not boiling, water on low heat, making sure that  the bowl does not touch the water.


Beat with an electric beater until the frosting stands in peaks. This should take 5-7 minutes.  Remove from heat and continue to beat for a few more minutes, until frosting stiffens and stands in smooth, fluffy peaks.  Beat in vanilla, along with lime juice.  After frosting cake, sprinkle zest on top of cake.

I took this to a dinner at a friend's house and it got great reviews.  The hint of lemon and lime was perfect.


This post is linked at Sweets for a Saturday

Sunday, July 3, 2011

Independence Day Cake

Happy Fourth of July!


This is one of my favorite holidays.  I'm wildly patriotic and love to celebrate.  I love the cookouts, the fireworks, spending time with friends and family.  And I greatly enjoy coming up with creative desserts to share with a red, white and blue theme!

Someone recently pointed me in the direction of a blue velvet cake.  The blue hue was striking and I thought, "that would be awesome for a July 4th cake!"  And so this is what I came up with.  The blue didn't come out exactly as bright as I had hoped, but it is still a pretty blue.  I didn't have the royal blue food coloring, so I used Cars Blue, left over from someone's birthday cake last year.  But like I said, it was still pretty blue, and the taste was great.  Like red velvet, only blue.  I paired it with a classic white cake, white buttercream frosting and strawberries.


I found the original recipe for the blue velvet cake here.

Blue Velvet Cake
2 cups sugar (I used 1 cup Splenda for baking)
1 cups (2 sticks) unsalted butter, softened
2 eggs
1 1/2 Tbsp unsweetened cocoa powder
1 Tbsp royal blue food coloring
1 small dab violet food coloring
2 1/2 cups flour
1 tsp salt
1 cup buttermilk
1 tsp vanilla extract
1 1/2 tsp baking soda
1 Tbsp white vinegar

Preheat oven to 350F.  Grease 2 round 8" or 9" cake pans, cut parchment paper to fit, and then grease parchment (I always use Baker's Joy and get great results.)
Using a mixer on medium-high speed, cream butter and sugar until fluffy.  Add eggs one at a time and mix well after each.  Mix cocoa powder and food coloring in a small bowl and add to the sugar mixture.
In a separate bowl, mix flour and salt together.  Add flour mixture and buttermilk to the sugar mixture, alternately.  Mix in vanilla.  In another small bowl, mix baking soda and vinegar. Add to cake batter.
Divide batter between the prepared pans and bake for 20-30 minutes.  Remove from oven when a cake tester comes out clean. Cool in pans 15 minutes, then remove to wire racks to cool completely.

Classic White Cake (recipe from Better Homes and Gardens)
4 egg whites
2 cups flour
1 tsp baking powder
Crumb coating
1/2 tsp baking soda
1/2 tsp salt
1/2 cup white shortening
1 3/4 cups sugar (I used 1 cup of Splenda for baking)
1 tsp vanilla extract
1 1/3 cups buttermilk (or soured milk-add vinegar to sour the milk)

It's worth noting here, and I only just realized this, that I only used ONE cup of sour milk because I was reading the WRONG recipe.  *smacking head on the keyboard*

Preheat oven to 350F.  Grease 2 round 8" or 9" cake pans, cut parchment paper to fit, and then grease parchment.  Sift together dry ingredients in a medium bowl and set aside.  Beat shortening with an electric mixer on medium to high speed for about 30 seconds.  Add in sugar and vanilla and beat until creamy.  Add egg whites, one at a time, and beat well after each addition.  
Add four and milk to butter mixture, alternately, beating on low speed until just combined after each addition.  Divide batter into prepared pans.  Bake 20-25 minutes, or until a cake tester comes out clean.  Cool in pans 10 minutes, then remove to wire racks to cool completely.

Freshly frosted
Buttercream Frosting (recipe adapted from Better Homes and Gardens)
I needed 1 1/2 of this recipe to frost this cake, this is a single recipe

1 cup shortening
1 1/2 tsp vanilla
1 lb powdered sugar (about 4 cups-although, I actually weighed it this time)
4-5 Tbsp milk

WIth an electric mixer on medium speed, beat shortening and vanilla for 30 seconds.  Add about half of the powdered sugar and beat well.  Beat in 2 tablespoons of milk.  Add in remaining powdered sugar and beat well.  Add in as much of the remaining milk to reach the desired consistency (I ended up using 5)

Assembling the Cake


Wash and pat dry 1 pint of similar sized strawberries, along with one large strawberry.  Berries should be ripe and firm, not mushy at all.  Set aside.

Place two wide strips of wax paper on your cake stand or cake taker. Removing these later will give the bottom of the cake a very clean finish.  I chose to layer the cakes white, blue, white blue.  On each layer,
spread a generous amount of frosting and place next layer.  When all layers are in place, frost entire cake with a thin crumb coating.  Allow cake to set for about ten minutes and then continue frosting the cake with the rest of the frosting.  There should be enough for a nice thick layer.

Once the cake is frosted, gently remove the wax paper strips from beneath the cake.  You should have a nice clean finish.  Now it's time to add the strawberries.  Hull and slice the similar sized berries in half and arrange all along the bottom edge of the cake.  Take the large strawberry and using either a knife or an egg slicer, slice it almost down to the hull, fan out the slices and place it on top of the cake.  And you're done!


I hope you all have a fabulous July 4th weekend, wherever you are.  And take a moment to appreciate that, despite not being perfect, America is still a pretty great place to be!

Saturday, June 25, 2011

Fresh Blueberry Bundt Cake


One of the reasons I love summer is the fresh fruit that is so readily available, especially the berries.  My family LOVES berries, all kinds.  Blueberries bring back memories of childhood.  I grew up in Maine and I think everyone has heard of wild Maine blueberries.  If you live out in the country, you likely have some wild blueberry bushes growing somewhere on your land (or some other berry-my mom has black raspberries growing all along her yard.)  

So the other day I made my inaugural trip to Costco (you're thinking, "What?!"- give me a break, I used to live overseas, no Costco there.)  Anyhow, they had these huge containers of beautiful blueberries, so I had to get some.  We've been snacking on them, putting them in our cereal, having blueberry pancakes, all the usual things.  But, we had a playdate to go to and I wanted to bring something yummy.  I had some buttermilk left over from the whoopie pies, and I wanted to use that if possible, too.  I didn't find what I was looking for in my cookbooks, but a quick search online gave me a recipe at Epicurious to work with.  The end result was a really moist, flavorful blueberry cake.

Aren't they beautiful?

Blueberry Buttermilk Cake
3 cups flour
1 Tbsp baking powder
3/4 Splenda for baking
3/4 cup butter or margarine (I used a 50/50 blend)
3 eggs
Zest of 1 large lemon
1 cup buttermilk
2 tsp vanilla extract
2 cups fresh blueberries


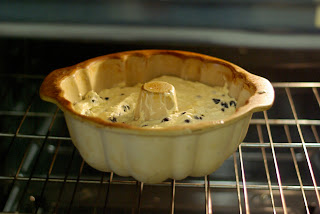
Preheat oven to 350F and prepare a large bundt pan.  I usually use Baker's Joy, although my stoneware bundt pan is pretty well seasoned, but I gave it a light spraying anyway. 
Combine the flour and baking soda in a medium bowl and set aside.  In another bowl, use a hand mixer or stand mixer to cream together the butter and sugar until nice and fluffy.  Add eggs, one at a time, combining well after each egg.
  
Combine the buttermilk and the vanilla.  Alternately add the dry and liquid ingredients to the butter/sugar combo, mixing well after each addition.  The batter should be thick and and airy. 

The next step is to lightly fold the blueberries in to the batter, trying to avoid breaking as few of the berries as possible, while distributing them evenly in the batter.  Transfer the batter to your prepared bundt pan, smoothing the batter in the pan.

Bake at 350F for one hour, or until a cake tester comes out cleanly.  We had to leave for swimming lessons and I was a little late getting this in the oven, so at 55 minutes, I turned off the oven and opened the door a crack, hoping for the best when we got back.  An hour later, we returned, I took the cake out of the oven, crossed my fingers and turned it out onto the cooling rack.  I needn't have worried.  The cake came right out of the pan and was fully baked.  I wrapped it up (still warm!) and rushed off to our playdate.  The cake got rave reviews from the moms and the kids in attendance.  

I'd make this again for a brunch, easily.  Or just to have on hand for a snack cake.  It's also a great cake to bring somewhere, as it traveled very well. It was easy to make and came out very moist and delicious.  


Sunday, June 19, 2011

Whoopie Pies!


Did you know that whoopie pies originated in Maine?  Pennsylvanians will try to tell you that they invented them, but don't believe them.  They are definitely from Maine.  I LOVE whoopie pies.  Two cakey cookies, with frosting in the middle?  What could be better?  And they are so adaptable. You can make different sizes, different flavors for the filling and the cake, there are tons of possibilities.  I've made traditional ones (dark chocolate cake, vanilla filling) and pumpkin cakes with cream cheese filling.  And I've had apple ones and I got a HUGE maple one at the Fryeburg Fair in Maine last year (THAT one was amazing.)  I want to make red velvet ones.  I love red velvet.  And I think banana would be yummy, too.  With cream cheese filling.

My munchkin had his last day of preschool and to celebrate, they had a party for the kids.  So of course, I brought dessert.  I had in my mind an idea of a cake that I wanted to make, but it didn't work out because I didn't have time the night before.  I had finals for grad school that I really had to work on and so I couldn't devote HOURS to baking.  I wanted to make whoopie pies for the kids, because it needed to be something kid friendly and little sandwiches are easy for little hands.  So, I decided on mini whoopie pies for the kiddos and one large cake size whoopie pie for the adults.

Little people like simple, so I went with classic chocolate cakes and vanilla filling.  This recipe is  from one in a magazine called Fresh that is published by the grocery store Hannaford.  Here's a link to the original, but I left out the instant coffee.  Preschoolers don't need coffee, even in minuscule amounts.


Whoopie Pies
3/4 cups unsalted butter, softened
3/4 cups packed brown sugar
2 eggs
3 cups flour
3/4 cup cocoa powder
2 tsp baking soda
1 tsp salt
1 1/2 cups buttermilk
1 1/2 tsp vanilla extract

Preheat oven to 350F.  As always, I use my baking stones which are well seasoned and do not need to be sprayed or lined.  Regular baking sheets should be lined with parchment or sprayed with cooking spray.
In a medium mixing bowl, stir together flour, cocoa powder, baking soda, and salt.  Set aside.  Measure out buttermilk and add vanilla and set aside.
With an electric mixer on medium speed, mix butter and brown sugar until well blended.  Add eggs one at a time and continue mixing until smooth.
Add half of the flour mixture to the butter and sugar mixture and mix on medium until smooth.  Add half the buttermilk mixture and continue to mix on medium speed, scraping the sides when necessary.  Add the remaining flour and then the remaining buttermilk, mixing until smooth after each addition and continuing to scrape the sides of the bowl.


For my large, cake size whoopie pie, I scooped several spoonfuls of batter on to the baking stone and smoothed it out into a large circle, about 8-9 inches across and baked them for 14 minutes.  For my mini whoopie pies, I used small spoonfuls (about a tablespoon) and baked them for about 10 minutes.  But for normal sized pies, about 2-3 tablespoons should be sufficient.  Cakes should be puffy, but still soft to the touch.  Let cool for about 3 minutes and then transfer to a cooling rack to cool completely.

Vanilla Filling
3/4 cups unsalted butter
1 tsp vanilla extract
2 3/4 cups sifted confectionary sugar
3 cups marshmallow creme  (Fluff is best, but not available everywhere)


With an electric mixer on medium speed, mix butter and vanilla until well mixed and creamy.  Add half of the confectionary sugar and mix on low to combine then on high.  Add the rest and mix again, scraping sides as necessary.
Add marshmallow creme and mix until filling is fluffy and smooth.

For the big whoopie pie, I slathered on several large dollops of filling, smoothed it out and added the top.

The little ones took about a teaspoon of filling.


The fickle preschoolers seemed to like them, although, some licked out the filling and others just ate the cakes.  And the big one came out great, too.


 I think next time, red velvet.  Or maybe gingerbread ones around Christmastime...

Wednesday, April 27, 2011

A Birthday Cake of Epic Proportions

My little boy just turned four years old and we had his birthday party over the weekend.  I gave him his choice of party themes and, surprise, he chose Buzz Lightyear.  So, I love to make a decorate his birthday cake every year and I wanted this year's to just be amazing.  I searched online for inspiration and, not finding what I was looking for, ended up just kind of winging it.

What I didn't wing, was the cake recipe itself. Like many other things that I cook and/or bake, I have go-to cake recipes.  I am a self professed chocolate fiend.  My son (weirdo) prefers yellow cake.  So this one had a little of both.  My go-to chocolate cake is actually part of another recipe .  I have been making it for years.  It is the BEST chocolate cake and whenever I make it, I always get requests for the recipe.  The birthday party was no exception.

Rich Cocoa Squares
2/3 plus 1/4 cup oil
3/4 cup unsweetened cocoa
2 eggs
2 cups sugar
2 1/2 cups flour
1 tsp baking soda
1 tsp salt
1 tsp vanilla
1 1/2 cups cold water


Combine all ingredients and mix thoroughly.  Pour into a 9"x13" pan.  On top of raw batter, sprinkle 1 cup of chocolate bits and 1 cup chopped walnuts.


Bake 30 minutes at 350.

So, that's the whole recipe.  But I use the basic cake recipe whenever I want to make chocolate cake for anything else.  I use it for cupcakes and two layer cakes.  It is moist and chocolatey and like I said, it always gets compliments.  It's also a "dump all the ingredients in the bowl and mix" cake.  For this cake, I used a 9 inch contoured Wilton pan because I wanted the top rounded and I didn't want to have to carve a two layer cake down.


Then I made a topper for the cake and a dozen cupcakes with a yellow cake recipe.  I'm not a huge fan of yellow cake, but this is the one I use when I have a cake to make.  And my son loves yellow cake and requested it.  It is moist and has a nice vanilla flavor to it.

Basic Yellow Cake from Better Homes and Gardens ( I love this cookbook!)
3/4 cup butter
3 eggs
2 1/2 cups flour
2 1/2 tsp baking powder
1/2 tsp salt
1 3/4 cups sugar
1 1/2 tsp vanilla
1 1/4 cups milk


Preheat oven to 375.  Grease and flour pans.  Allow butter and eggs to come to room temperature.  In a bowl, stir together flour, baking powder and salt and set aside.  Beat butter with an electric mixer on high for 30 seconds.  Gradually add sugar, beating until well combined, then beat two minutes more.  Add eggs one at a time, beating well after each addition.  Beat in vanilla.  Alternately add flour mixture and milk, beating on low speed until just combined.  Spread batter into prepared pans.

For two 9 inch pans, bake 20-25 minutes.  I baked 12 cupcakes and put about 1/2 of the batter in my small Pampered Chef glass mixing bowl.  The cupcakes baked for about 18 minutes.  The bowl cake took much longer, over 30 minutes.  I used a melon baller to make some craters in the bowl cake, since it would become a moon later on.


So, then it was on to the icing.  I always use the basic buttercream icing recipe from Wilton.  

Wilton Buttercream Icing
1/2 cup solid vegetable shortening
1/2 cup butter or margarine, softened
1 tsp vanilla extract (use clear if you will need white icing)
4 cups confectioner's sugar (ideally, it should be sifted, but I hardly ever do it)
2 Tbsp milk

Thick icing

In large bowl, cream shortening and butter with electric mixer. Add vanilla. Add sugar, one cup at a time, beating well on medium speed. Scrape sides and bottom of bowl often.  Add milk and beat at medium speed until light and fluffy. Keep bowl covered with a damp cloth until ready to use.
For best results, keep icing bowl in refrigerator when not in use. Refrigerated in an airtight container, this icing can be stored 2 weeks. 
For thin (spreading) consistency icing, add 2 Tbsp water or milk; for medium, add 1 Tbsp.  Thick icing is used for decorations like leaves, thin is used for icing the cake.  I use medium for everything else.  I used 1 recipe for this entire cake and had a little left over.

First I iced the chocolate cake blue and the yellow cake gray, to look like the moon:

Then I added green, purple and orange to the borders:


Buzz hanging out on top

Next, I did the yellow cupcakes.  I blended the different colors with white and added blue sprinkles.  And on top of each one I put a yellow chocolate star that I made with yellow chocolate melts and a star shaped mold:


And finally, the finished cake (minus Buzz, because he kept falling off):

It was a great hit and everyone loved it, most of all my son, whose opinion is the only one that really mattered, anyway.

Monday, January 31, 2011

Ukrainian Walnut Cake


So I decided to get a little crazy and make this cake for a party at Christmastime. My mom cut it out of some magazine years ago and it was one of those things I always looked at in my recipe file and never has the energy to try. It was easily the most labor intensive cake I have ever made. It took hours, with the grinding of the walnuts and the whipping of the egg whites, making the filling and the icing.


But, wow, was it ever worth it. It was so rich and so decadent, but because of the egg whites, it was still so light and not heavy at all. It was not an easy cake, nor it is low-cal, and it was very time consuming, so if you are looking for something quick and easy (on your time and your waist), this is not your cake. But if you've got the time, and the inclination, you won't be sorry.

Ukrainian Walnut Cake
10 oz finely ground walnuts, plus 3 Tbsp chopped walnuts
1/2 cup all purpose flour
2 tsp cornstarch
1 tsp baking powder
12 large eggs, separated
1/4 tsp salt
1 1/4 cup sugar
3 1/2 tsp vanilla extract
3/4 cup butter, softened
6 oz unsweetened chocolate, melted
6 1/2 cups sifted confectioner's sugar
3/4 cup strongly brewed coffee (I used instant)
1 1/2 Tbsp coffee liqueur (optional)
2 cups heavy cream
2 tsp instant coffee granules

1. Make the tortes: Heat oven to 350F. Butter the bottoms of two 10-inch round cake pans and fit with circles of parchment paper. Butter the paper and pan sides and set aside. Combine the ground walnuts, flour, cornstarch, and baking powder and set aside. Place the egg whites and salt in a large bowl and beat until stiff peaks form. Set aside. Place the egg yolks in a large bowl and beat on medium-high speed. Gradually add the sugar and continue to beat until the mixture becomes thick and fluffy -- about 5 minutes. Add 2 tsp vanilla, mix to combine and set aside. Sprinkle the walnut mixture over the yolk mixture and fold in the egg whites until combined. Divide the batter between the prepared pans and bake until the cake centers spring back when lightly touched -- 25 to 30 minutes. Run a knife around the pan sides and turn the cakes out onto wire racks. Cool completely.

2. Make the mocha frosting and coffee filling: Beat the butter, chocolate, remaining 1 1/2 tsp vanilla, and 1 1/2 cups confectioner's sugar together until creamy. Alternately add the coffee, liqueur, and 4 1/2 more cups of confectioner's sugar and continue to beat until fluffy. Set aside. Beat the heavy cream, instant coffee and remaining 1/4 cup confectioner's sugar to soft peaks..

3. Assemble the cake: Split the cakes. Place one split layer on a cake plate and spread 3/4 cup mocha frosting over top. Follow with a third of the coffee cream.Place second layer on top and repeat with frosting and cream. Repeat with third layer. Place the final layer on the cake and spread the remaining mocha frosting over the top and sides of cake. Decorate with the chopped walnuts. Refrigerate until ready to serve.