Monday, May 30, 2011

Birthday Cake

Birthday cake for my own birthday.  And no, I didn't HAVE to make my own birthday cake, I wanted to!


I was on the search for a new and interesting cake to make for our Memorial Day weekend/birthday BBQ.  I recently stumbled on the blog BrownEyedBaker while looking for a recipe for a homemade moon pie (but that's a different post altogether.)  On the morning of my birthday, I happened to click on her site and the cake she had posted that very morning looked amazing.  It seemed like kismet!  I mean, she had posted this amazing looking and sounding cake on my very birthday, right?  So, of course I decided to make it.

The cake was a Root Beer Float Cake and it ended up being as amazing as it looked.  I love root beer floats and hardly ever get a chance to have one.  And the vanilla ice cream along with the cake really brought out the root beer flavor.  I got great compliments on it and I would definitely make it again.  I think I'd like to try maybe using Cherry Coke, too!

I made a few changes when I made the cake.  For one, I used Splenda for baking in the recipe. I also made a two layer cake instead of a bundt cake.  Bundt cakes are okay, but I prefer a layer cake when there is frosting involved.  Luckily, the recipe adapted well for a two layer cake.  And I thought that I might have to make more frosting, but it ended up being the perfect amount.


Root Beer Float Cake

2 cups root beer (NOT diet, even though you might be tempted!)
1 cup dark unsweetened cocoa powder
½ cup (4 ounces) butter, cut into 1-inch pieces
1¼ cups granulated sugar
½ cup light brown sugar
2 cups all-purpose flour
1¼ teaspoons baking soda
1 teaspoon salt
2 eggs


Preheat oven to 325F degrees. Spray the inside of two 9 inch cake pans with non stick baking spray and set aside.  In a medium saucepan, heat the root beer, cocoa powder and butter over medium heat until the butter is melted. Add the white and brown sugar and whisk until dissolved. Remove from the heat and allow to cool.  Meanwhile, in a medium bowl, whisk the flour, baking soda and salt together.  In a small bowl, whisk the eggs and add a small amount of the cooled cocoa mixture to temper the eggs.  Add the eggs and cocoa back into the cooled cocoa mixture until combined. Gently fold the flour mixture into the cocoa mixture.  Slightly lumpy batter is okay.
Pour the batter into the cake pans and bake for 25 to 30 minutes, until a small sharp knife or a cake tester inserted into the cake comes out clean. Transfer the pans to a wire rack to cool for 10 to 15 minutes, then turn the cakes onto the rack to cool completely.
While the cakes cool, it's time to make the root beer frosting!

Root Beer Fudge Frosting


Put all of the ingredients in a food processor. Pulse in short bursts until the ingredients are well blended and frosting is shiny (you may need to scrape the sides of the food processor a couple of times.) I've never made frosting in a food processor before, but this method worked wonderfully!  If you don't have one, throwing all the ingredients in a bowl and using a mixer will work just fine.  Spread  the frosting over the first layer, place the second layer and finish icing the cake. Let the frosting set before serving. 

Enjoy!  This was easy to make and gone in a flash!


Wednesday, May 25, 2011

A Plan to Can

Brand new canning supplies!

I have a plan, a plan to can.

I have recently purchased all the necessary items needed for a beginner canner.  My husband leaves soon for a month long TDY and the fresh fruits and vegetables are abundant.

What will I make?  Well, I plan to start with a  simple strawberry jam.  And I want to try some pickles and spaghetti sauce.  And then more jams and sauces.  Who knows how creative I could get?

I think it's going to be a busy summer.

Sunday, May 22, 2011

My Grandma's Strawberry Rhubarb Pie

This was probably my favorite pie when I was younger.  As a matter of fact, it's still my favorite.  I love strawberries and I love how the rhubarb works with them.  It's just SO. GOOD.  I have memories of my wonderful Grandma Hazel making this pie, and this is her recipe.

Seriously, it's so yummy.

Even though making pie crust is my nemesis, I refuse to use a pre-made crust.  So despite my difficulties with crust, I just keep trying to find one that works for me.  I got this one from Salad in a Jar and it worked okay for me, although the top crust didn't come together quite as well as I would have liked.  Still, it worked well enough.  I might give it another try.

Simple Pie Crust
3 cups all purpose flour
1 cup shortening
6-9 Tbsp ice water
pinch of salt

Use a pastry cutter or a food processor to cut the flour and the shortening (two butter knives will work if you don't have either of those)  I used my food processor and pulsed it a few times until the shortening was reduced to the size of peas.


Sprinkle the ice water over the mixture and begin to press in to a ball.  Only use as much water as necessary to avoid ending up with a too moist ball of dough.  Once you have a nice ball of dough, it's time to roll it out. I tried this method because it was one I hadn't used before.  Take a plain tea towel and sprinkle with flour.  Dump the dough ball on to the floured surface and using the towel, press it into a tighter ball.  Use your floured rolling pin to roll the ball dough outward from the center. When the dough is large enough and thin enough, place the pie plate over the dough, slide your hand under the tea towel and flip the whole thing upside down.  Then it is ready to fill!

Ideally, this would be a whole lot smoother looking, but as I said, I am pie crust challenged

Strawberry-Rhubarb Pie Filling
2 cups cut up strawberries
2 cups cut up rhubarb
2 eggs, beaten well
1 1/2 cups sugar (I used 3/4 Splenda baking blend)
3 1/2 tsp flour
1/2 tsp nutmeg

Beat the eggs.  Add sugar, nutmeg and flour together and beat into eggs.  Pour over cut up fruit and mix well.  

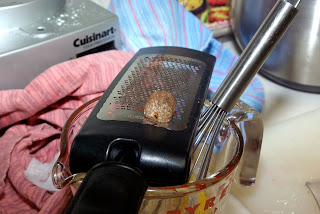
Freshly grated nutmeg-SO much better than the pre-grated stuff!

Pour entire fruit mixture into prepared pie crust


Cover with top crust.  Now, here's where mine goes a little awry, since my crust came out less than perfect. I ended up taking large sections on pie dough and just placing them over the filling, while forming the edge.  It actually ended up looking quite nice.  But, ideally, you'd place an entire second crust on top and then crimp the two together at the edges.

Not perfect, but workable
Place pie into a oven preheated to 400F and bake for 15 minutes.  Reduce the heat to 350F and bake an additional 35-40 minuted, until crust is browned.


Like I said, I love this pie.  It is sweet and just a little bit tart.  And this crust turned out to be nice and flaky.  And now I'm craving this pie again, so I might have to make it again soon!

Saturday, May 14, 2011

Chocolate-Cherry Lattice Squares

Sometimes, I need a dessert.  Quick.  So I look in my pantry and see what I have and what I can come up with.

I needed something the other night and I had this recipe for these peanut butter squares, made with peanut butter chips.  My husband informed me that he doesn't do peanut butter in desserts (who knew?) so I modified the recipe somewhat and this is what I came up with.  I can't give credit for the original recipe where I got my inspiration, though.  It was written in my beloved recipe book, so maybe it was my grandmother's?

Chocolate-Cherry Squares, with whipped cream and with rocky road ice cream
Served in my pretty new (to me) 1930s Depression glass dessert bowls

Chocolate-Cherry Lattice Squares
2 cups chocolate chips
1 cups sugar
2 eggs
2 tsp vanilla extract
2 cups flour
1 1/2 tsp baking soda
1/2 tsp salt
1 can cherry pie filling (I had this in the pantry, I have no idea WHY)


Heat oven to 375.  Microwave chocolate chips 1 minute, stir and heat an additional 30 seconds at a time until melted and smooth. It took only a minute and a half for these to melt.

Yum, a bowl full of chocolate!
Beat butter and sugar until creamy and fluffy.  Add in eggs and vanilla.   Blend in melted chocolate.  Add dry ingredients.
Divide the dough in half.  Place half in refrigerator.  In a 9x13" pan, press the other half of the dough into the bottom of the pan.  This part is tricky, because the dough is a little sticky and it tries to pull up as you are pressing it down.  Once it is as smooth as you can get it, bake for 10 minutes.

Press the dough into the bottom of the pan.  Don't bake the spatula.

Once cooled, pour the pie filling over the baked layer.  Roll chilled dough between two pieces of waxed paper.  Cut into strips and place over pie filling in a lattice fashion.  Bake for an additional 20-25 minutes.

Just out of the oven, the cherry is all bubbly

We had company over and these got great reviews.  I believe the quote was "We get the greatest treats whenever we come over here!"  And then tonight, after having them again for dessert, my husband told me they were fabulous, just like me.  He's a keeper.

I would make these again, but I think I'd try doing a half batch and using a 9x9" pan.  This made a lot.  I'd also like to try making them with a homemade filling.  I like to do homemade whenever possible, but I was in a time crunch the other night and I had the pie filling available.